Thursday 26 May 2016

Making 'Jun Tea'

Welcome dear friends,
Today I want to share a new health drink we have added to our home in the last month.
It has been a very welcome addition to our various probiotic home made foods and drinks.
I just love adding new health products to our families diet.
I have wanted to make 'Jun Tea' for so long.
I wan't sure how I would get an authentic Jun scoby though and so I waited and waited and waited......
Finally I was able to purchase one and we have really enjoyed this lovely probiotic drink.

How do I make it?
First I put 4 green tea bags in 2 cups of boiling water and let brew for a few minutes.
Then I add 1/2 cup of raw honey to the tea and then add 6 more cups of filtered water.
Next is to put the jun scoby and it's at least 1/2 cup of 'tea' from the last batch in too.

Let sit for three days and then take out the scoby and some of the tea for the next batch.
You can then leave another three days as is or add a second ferment.
We love to add a herbal tea of strawberry, Raspberry and Loganberry and leave for another three days.

Now we are all ready to enjoy another probiotic drink through out the day.

God Bless
Stephen and Gae

Tuesday 17 May 2016

Elderberry Cough Syrup and Tincture (How we make it)

Welcome dear friends,

Here is a continuation of home remedies we use in our home and with winter just around the corner I am making a fresh batch too.

Since we started our 'fight against the badies' last May I have gone from buying  Sambucol Black Elderberry Extract to making our own.
My reason for this was it was nearly $18 for 120 ml and that tends to go very fast when using it on a household the size of ours.

From my local Health Food Shop I was able to get 1/2 a kilo of dried Elderberry for $40.
Since then I have made the recipe below three times as well as a tincture (also below) and still have berries left.

I think I get about 800ml from each recipe and so I think that is a lot better deal than I was getting.
I might be able to get a little more but I sometimes forget to monitor the reducing part of the recipe and so let it reduce a little too much.
Now before I tell you how I made it I want to explain just a little about both the syrup and the tincture-

"Because of Elderberries effects on the body, they are used medicinally for colds, fevers, respiratory ailments, arthritis, blood cleansing, sore throats, hoarseness, laryngitis and it's high in Vitamin C so it may be taken regularly for immune health.
Elderberry can be made into wine, pies, tinctures and syrups.
Tinctures and syrups are usually used medicinally. 
The difference between a tincture and a syrup is this: Syrups are made with honey, water and other medicinal spices/herbs such as ginger, clove and cinnamon.
These additional herbs and spices are used for flavor but also have a circulatory and protective benefit to the body.
Elderberry syrups are delicious for children but are perishable, only lasting in the refrigerator about 3 months at the most.
Tinctures are made without honey or water. And since they are made with vodka as the base, they last much longer than elderberry syrup.
Elderberry Tinctures are said to last at least 3 years but I think if they are stored in glass bottles and not exposed to light or heat, they may last even longer than that!" I am not sure where I got this from a while ago but it sums it up nicely.

ELDERBERRY SYRUP-
So how do I make it?
There are many recipes around the Internet but this is the one that I like to make
I can vary it as I want based on what ingredients I may or may not have.
Into a pot place
3 1/2 cups of water
2/3 cup of dried black elderberries
2 tablespoons of dried ginger
1 teaspoon of cinnamon powder
1 teaspoon of  whole cloves
3/4 cup of frozen blueberries (this could be optional)
In fact the spices could all be optional if you did not have them but they each have additional medicinal value to the syrup so I add them
Bring to the boil and then reduce heat  and simmer for about 45 mins until the mixture has reduced in quantity
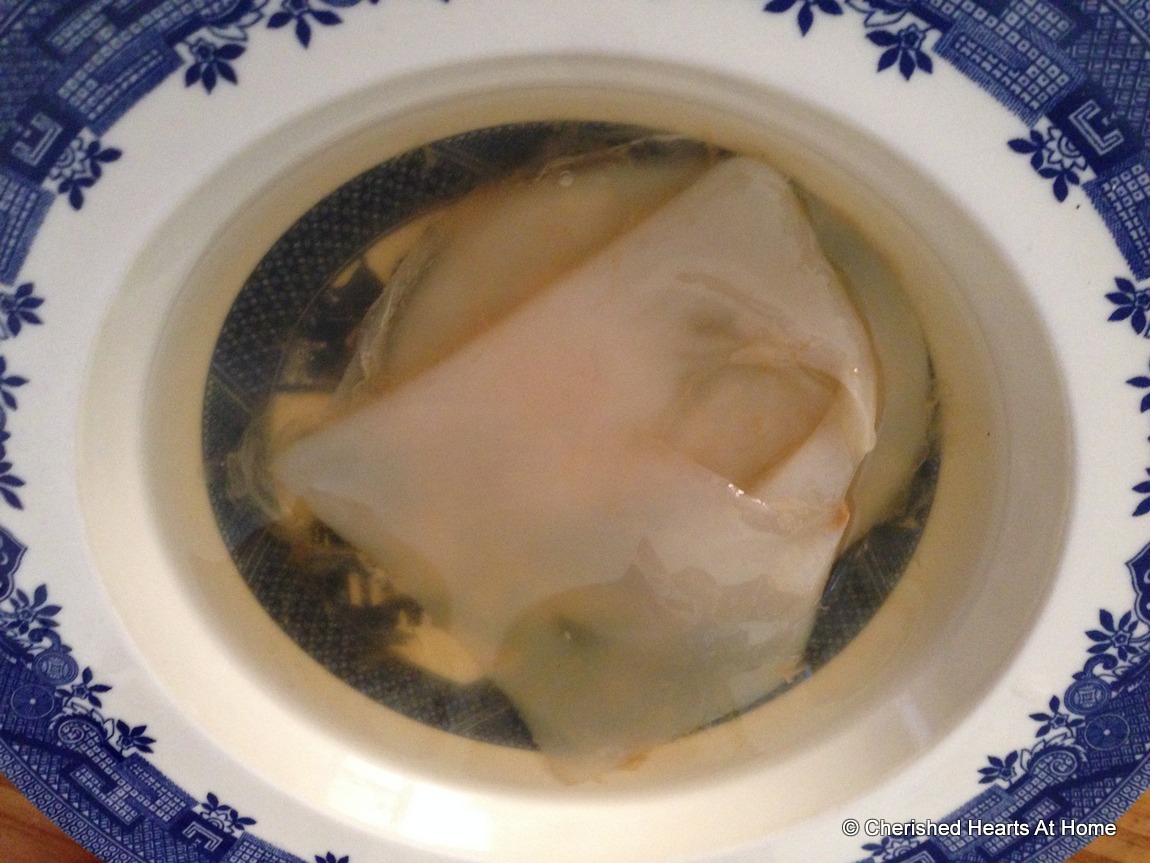
Then using a strainer strain the liquid through into another bowl.
Squeeze the last bit of liquid through to get the most of your syrup

If you are worried about gritty bits you can then double strain it through some muslin.
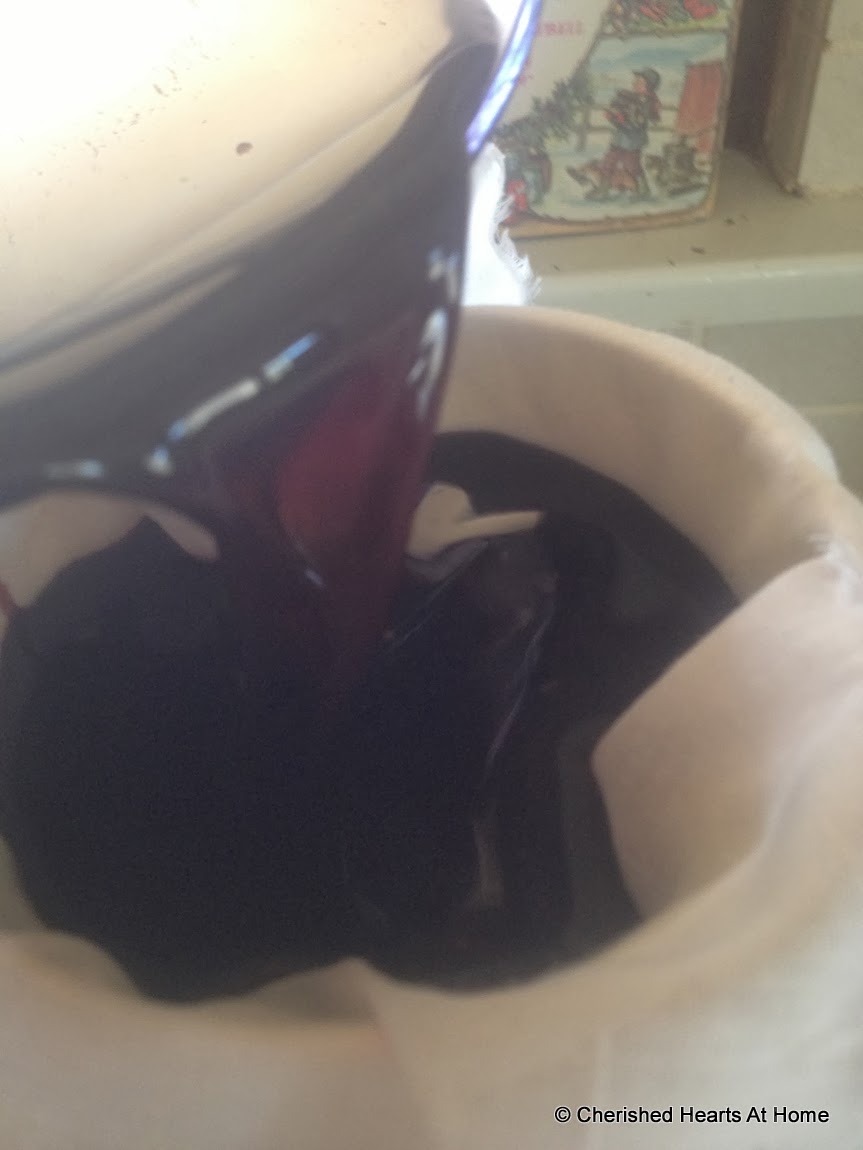
When It has cooled to room temperature you then add 1 cup of raw honey to the mixture.
 You will need to stir for a while to mix it through thoroughly.
Poor into your bottle and use as needed. Date it so you know when you made it and how long it should last
It does need to be kept in the fridge and used up within a couple of months or so.
Make sure you shake it each time to ensure the honey stays mixed through.

Dosage- I give our little kids about 10ml and adults 20ml
I give it at least 3 times a day but it can be given every 2-4 hours for the first day at  the onset of a cold.
Then followed the next day and beyond by same amount every 3-4 hours
I don't just because we will go through it so fast again
ELDERBERRY TINCTURE-
You will need:
Dried or fresh elderberries
water if you use dries berries
80-100% proof vodka (very hard to find in Australia) but it needs to be the high alcohol content for medicinal purposes
Jar -mine is about a 4 cup jar
Fill the jar about a third full of Elderberries
Just cover the dried berries with a filtered water
Then fill the rest of the jar up with the vodka
I'd say it is one cup elderberry to three cup vodka

Cover and shake
Store in a dark place for approx 3-6 months shake it every couple of days or so

Strain as you would for the syrup and put into amber coloured little bottles. Date again as you would the syrup for your own information
This keeps almost indefinitely and is great to have ready available at all times unlike the syrup which has a limited shelf life

Dosage- 1-2 tablespoons daily for prevention and up to 4 times daily at the first show of cold/flu symptoms.
For children half this and put it into a cup of hot drink with a little raw honey to dissolve the alcohol content   and make it a little sweeter and thus more palatable

God Bless
Stephen and Gae

Saturday 14 May 2016

"How we fight the Badies" - how to stop cold and flu Naturally

Welcome dear friends,
Again before moving on to some additional ways we try to prevent as well as treat colds and flu I ma sharing what we have done and still do in this area.
We still use these methods but i have some other tricks up my sleeve these days to share too.

And so it begins!!!

It seems that suddenly we have now hit the Autumn Season in a big way and thus we are in the process of being susceptible to colds and flu in our family circle.

Nearly always it is our sweet Myffwyn who gets it first and then generously shares it with nearly everyone else. Myffy tends to get it the worst and often gets very sore around her mouth and nose from constantly wiping there. She always gets a cough and the whole miserable thing. However she also is one of the easiest to help as she tends to go into hibernation mode and allow her body to recover with rest.

I am a big believer also in getting the children outside as soon as possible for some sunshine and fresh air. I do think this is a natural way to help the healing process, however only once they are past the quite sick stage that is.

Before that is is rugged up and lots of love and cuddles while giving the best of medicines we can.
But what do we do when the baddies  wont stay away?
Well this is what we have been doing this year and I have found that it not only helps with the cold but seems to reduce the time it actually stays around before going off to plague some other poor unsuspecting family.

Three times a day I give out to the sick person:
I line them up in this order and they are consumed from left to right in quick succession, leaving the best till last!
1. Olive leaf Extract (the amount on the side for age appropriate people)
2. Sambucol - black Elderberry extract. I love this but it is quite expensive $17 for a small bottle and so I really need to order some dried Elderberries and make my own. At least I have now found an Australian supplier so this is next on my making list.
3. Next is a fruit juice mix of cranberry and other fruits and/or vegs. It can vary at times but I always get the one with out sugar. However you need to look VERY carefully for this.
Updated 2014 Here is my post on how we make our own Elderberry Syrup and Tincture that I now use exclusively instead of the bought brand
4.Vitamin C and Zinc powder. This brand is currently the best value for money at my Health Food  Store and I really like the powder as I can vary the amount given more easily than edible tablets.
Not to mention our children LOVE the edible tablets and tend to treat them like a treat and so we have had the situation of having no Vit C when a cold actually made it to our home.
I add this to orange juice or water, but like the added boost form the orange juice usually.
The next thing in our 'fighting baddies' arsenal is TEA.
We use three types as a rule and vary them to suit individual taste and how the person is feeling.
English Breakfast Tea with milk
Chamomile with raw honey, and sometimes ginger
Peppermint with raw honey.
These are given often through out the day
This one is my favourite and I drink it even when I am not sick!!
A simple Hot Honey and Lemon drink.
We even use that bottle of lemon juice on the shelf from the supermarket if we do not have fresh lemons (and frankly it is often quicker if you have a heap of sick children)
So into a large mug put generous amounts of lemon and raw honey, I do mean generous. I love it very tangy and yet very sweet.

Of course Raw Honey is so much better for you but if you cant get that just use what ever you have on hand, it will still be good for you.

Pour on the boiling water and stir till the honey dissolves, then sit back and drink a mug or two (or even three as I have tonight)
Next I will use this chest rub.
This is my home made version of 'Vicks Baby Balsam' and is so much better as it does not use petroleum jelly.
Rub this on the chest and back and soles of the feet to help with stuffy noses and breathing.
How did I make it? Well that is one of my upcoming posts!
Be surprised at how easy it is to make and very cheap too.

You might have a constant 'nose rubber' who needs some softening and healing cream to help during this time.
In the past I have used Bepanthen  and Lansinoh both of which do an excellent job but again can be quite expensive if used in large amounts.
So I made this lovely soft and healing hand cream which is perfect for  around the nose and mouth


And then of course their is specific lip balm that not only tastes good and smells good but is so much better than the standby I have used for years with out knowing the danger of using it all the time... Petroleum Jelly.
Yes it is cheap and yes it can help with the cracked lips  but really the home made lip balm is equally as cheap too .

In fact you really only need a few key ingredients to make all these at home, in a large supply, very easily and to your own personal preferences.

Yes I know I will post the 'how to' later in the week for you.

Now you know this is how we 'fight the baddies' in our home. I am sure there are some other things I have forgotten however I will add them if I think of them soon
I hope you will try some or all of the ideas and see how they work for you.
If you do please let me know how successful they were for you!

God Bless,
Stephen and Gae

Thursday 12 May 2016

A Tour around our Home Apothecary

Welcome dear friends,
As we are always adding to our little "apothecary" I thought I would show you what it looked like a about a year ago. Since then I have added quite a few new items to our  medicine chest as well as my 'first aid kit for the car'.

As I had some new herbs arrive yesterday I wanted to show a before and after and how we use some of these medicines in our home.

I thought some of you may be interested in seeing our Home Apothecary or "The Little House of Healing" as Vellvin and Rogan named it.

It has been a very exciting venture to be able to grow in this area of Natural Healing for my family.
I have been interested in natural remedies since I was a young girl but never had the opportunity to access the ingredients.

Since moving here I not only have access to supplies but I am also  gaining much knowledge to use as well.
Amazingly enough in this house was a room that was simply a 'nothing room' that I was able to convert to our Home Apothecary.

So on with the tour! I will simple list what is on our shelves and guide you through ☺
Please enjoy 
Starting form left to right following around the bench are:
My folder of ideas, recipes and information.
Blessed Salt
Beeswax for making candles and adding to many  home remedies
Soy melts for candle making 
Bentonite clay - in green, pink and white
Bay Leaves
Diatomaceous earth
Next up we will travel around my dried herbs-
Alfalfa
Ashwagandha 
Burdock Root
Calendula
Chaste Berry
Comfrey
Camomile
Dandelion Root
Echinachea 
Elder Flower
Elderberry Berries
Eyebright
Eye Herb mixture I made up for 
Fenugreek Seeds
Feminine Tea- a mixture I made up for the girls in our family
Frankincense resin
Golden Rod
Herb Robert
Horstail
Ladies Mantle 
Lavender
Lemon Balm
Licorice Root Powder
Marshmallow Root
Nettle Leaf
Passionflower Tea
Peppermint
Raspberry Leaf
Red Clover Flower
Rosemary
Spearmint
Slippery Elm Powder
Sage
St Johns Wart
Valerian
Wormwood 
Out of sight is Magnesium flakes
Now onto my Infused Oils and Essential Oils:
Top Row-
Infused Comfrey Oil (home made)- how to linked in the post
Infused Lavender Oil (home made)
Arnica
Bergamot
Black Pepper
Bliss
Calm Kids
Chamomile
Cinnamon
Clary Sage
Clove Bud
Eucalyptus
Frankincense
Ginger
Grapefruit
Jasmine
Juniper
Lavender
Lemon
Myrrh

Bottom Row-
Calendula Infused Oil
Lavender Infused Oil
Shea Butter
Cocoa Butter
Vitamin E oil capsules
Hair Oil tonic
Tea Tree Spray
Activated Charcoal
Almond Oil
Rose hip Oil
A tube of Dettol
Continuation of Top Row:
Essential Oils -
Oregano
Peppermint
Pine Scotch
Rose Geranium
Rosemary
Sandalwood
Spirit of Woman
Sweet Orange
Tea Tree
Thieves Oil
Thyme
Wintergreen
That is all the  Essential Oil

Further along the top row:
Ear Drops
Rescue Remedy
Peroxide
Zinc Cream
Oil of Emu
Caster Oil
Glycerin
Tea Bags-
Rose hip Tea
Nettle  Tea
Raspberry Leaf Tea
Hops Slumber Tea

Apricot Oil
Almond Oil

Aromatic Oils for  burners

Continuation of Bottom Row:
Arnica Salve (bought)
Calendula Salve
Comfrey Salve
Thuja Salve
Witch Hazel Lotion
Healing Salve (my own mixture for school sores etc)
Lanolin
Magnaplasim  (splinter removal)

Black Pepper Hand Warming Cream
Oregano in Coconut Oil for rubbing on  feet for colds

Chest rub - liquid
Chest rub - cream
Chest rub for children

Raw Organic Honey
A container or sticky plaster
In the middle of the bench is a tea cup and saucer for the rescue remedy for upset and hurt little ones
Pestle for grinding herbs
A jar of band aids and cotton buds etc.
A sensory brush for calming down little people
Missing is my Healing Basket.

So there are all the items in my little Apothecary or "Little House of Healing" as we call it 

God Bless
Stephen and Gae

Sunday 1 May 2016

Our First Chickens- a blast from the past

Welcome dear friends,
As we have been  changing and adding to our poultry over the last year or so. I thought it would be interesting to see how our getting chickens was  the first of our Homesteading activities.
So enjoy this post from the past about getting our first chickens.....

A couple of weeks ago we were given two chickens too keep.
This has been so lovely as we have wanted chickens since we moved to this house as it already had a chicken coop.
Well, actually we have wanted chickens for a long time and in fact I have wanted some since we were first married.
The children loved having them and kept going to 'check on the chickens' at any opportunity they had. In fact it is a great distraction for fussing little ones too.
We actually were not sure that they would lay eggs and so imagine our surprise and pleasure when we checked over the first couple of days and then discovered  our first egg.
On the same day we  got our older chickens we were driving home from town and saw a truck with chickens for sale in it.
Rogan had some birthday money and bought three for himself and we bought two more as family chickens.
These ones are only 9 weeks old and so are not ready to lay yet.
Stephen and Rogan had made a nesting box for the chickens quite a few weeks ago in anticipation of the chickens and so then made some roosts for them to climb up on and perch on using materials that were lying around.

Completed chicken nesting boxes.
As we have a very large chicken coop for them it was lovely to see them walking around doing all sorts of scratching and pecking and of course giving the chickens the left overs and scraps is quite rewarding.
This was our first egg and the kids just had to put it in different situations and take photos.
I love this one!
We had this cute little egg carton left over from Easter and the children loved putting the egg inside until we had more than four eggs that is.
Aren't they just so sweet. Rogan had actually started cleaning this coop area up almost form the time we moved in here in anticipation of this day.
So the the two older chickens both seem to lay one egg each per day. So over the first week we collected the eggs and saved them for a special morning breakfast of bacon and eggs.

I was amazed when I started to cook them  how they did not spread all over the fry pan like the ones we have bought always  did.
The first four of our very own home range eggs!
See the difference here. I just happened to add a store bought free range egg, on the left, to one of our own home laid eggs, on the right and look how different they look.

I can only tell you how happy we are at this next step we have taken in  growing our own food.
And it just keeps getting better and better!

What do I mean?
Oh yes today we got two little virtually new born lambs so be prepared for lots of lamb pictures soon too :)

God Bless,
Stephen and Gae